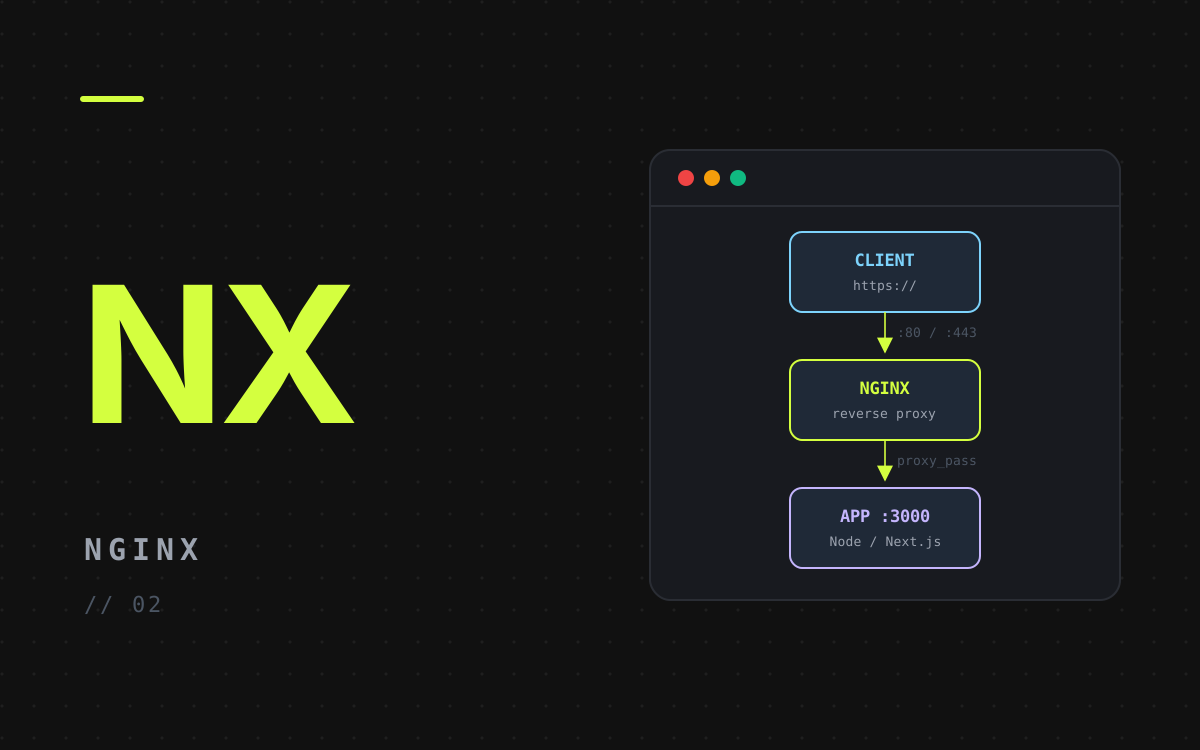
Your app listens on port 3000, but visitors expect your domain on port 80 (and later 443). Nginx sits in front as a reverse proxy: it accepts public traffic and forwards it to the app, which stays private on localhost.
This guide is a copy-paste script for an Ubuntu server: install Nginx, proxy your domain to the app, then add a free Let's Encrypt certificate with Certbot so everything runs on HTTPS.
Install Nginx
Run the steps as root (or prefix each command with sudo):
sudo su -

apt update
apt install -y nginx
systemctl status nginx --no-pager
Open the Firewall
The Nginx Full profile opens ports 80 and 443. The name is case-sensitive, and allow SSH before enabling the firewall, or you will lock yourself out:
ufw allow OpenSSH
ufw allow 'Nginx Full'
ufw enable
ufw status
Allow WebSocket Upgrades
Next.js dev tools, Socket.IO and similar libraries use WebSockets. This map (created once per server) sends Connection: upgrade only when the client asks for an upgrade:
cat <<'EOF' > /etc/nginx/conf.d/connection-upgrade.conf
map $http_upgrade $connection_upgrade {
    default upgrade;
    ''      close;
}
EOF
Write the Server Block
Set your domain and app port, then generate the site config:
SITE_DOMAIN=example.com
SITE_APP_PORT=3000

cat <<EOF > /etc/nginx/sites-available/${SITE_DOMAIN}
server {
    listen 80;
    listen [::]:80;

    server_name ${SITE_DOMAIN} www.${SITE_DOMAIN};

    location / {
        proxy_pass http://127.0.0.1:${SITE_APP_PORT};
        proxy_http_version 1.1;

        proxy_set_header Upgrade \$http_upgrade;
        proxy_set_header Connection \$connection_upgrade;
        proxy_set_header Host \$host;
        proxy_set_header X-Real-IP \$remote_addr;
        proxy_set_header X-Forwarded-For \$proxy_add_x_forwarded_for;
        proxy_set_header X-Forwarded-Proto \$scheme;

        proxy_cache_bypass \$http_upgrade;
    }
}
EOF
The Mistake That Breaks It
The heredoc is unquoted (<<EOF) so that bash fills in ${SITE_DOMAIN} and ${SITE_APP_PORT}. But bash would also replace Nginx's own variables, such as $host and $remote_addr, with empty strings. You would get proxy_set_header Host ; and nginx -t would fail. Escaping them as \$host keeps them for Nginx.
Two smaller choices:
127.0.0.1instead oflocalhost:localhostcan resolve to the IPv6 address::1, and the proxy fails if your app only listens on IPv4.$connection_upgradeinstead of a fixed'upgrade': normal requests keep using regular keep-alive connections.
Enable the Site
ln -s /etc/nginx/sites-available/${SITE_DOMAIN} /etc/nginx/sites-enabled/

# Optional: remove the default welcome page
rm -f /etc/nginx/sites-enabled/default

# Long or many domain names need a bigger hash bucket
sed -i 's/# server_names_hash_bucket_size 64;/server_names_hash_bucket_size 64;/' /etc/nginx/nginx.conf

nginx -t && systemctl reload nginx
Always run nginx -t first: it validates the config, and a broken config never reaches the running server.
Start Your App and Test
Start the app on the port you chose, for example npm run start -- -p 3000 for Next.js, and keep it running with a process manager such as PM2 or a systemd service. Then check from your machine:
curl -I http://example.com
A 200 (or your app's redirect) means Nginx is forwarding traffic. A 502 Bad Gateway means Nginx works but nothing is listening on the app port.
Add SSL: Before You Start
- DNS:
example.comandwww.example.commust point (A and, if you use IPv6, AAAA records) to this server. - Port 80 is open: Let's Encrypt validates the domain over HTTP. The
Nginx Fullfirewall profile opens both 80 and 443. - The site already works over HTTP:
curl -I http://example.comreturns your app.
Install Certbot
sudo apt update
sudo apt install -y certbot python3-certbot-nginx
The python3-certbot-nginx plugin lets Certbot read and edit your Nginx config.
Get the Certificate
sudo certbot --nginx -d example.com -d www.example.com
Certbot asks for an email address (for expiry warnings) and for you to accept the terms. It then proves you control the domain, saves the certificate under /etc/letsencrypt/live/example.com/, and updates your server block to listen on port 443 with that certificate.
It normally also adds a redirect from HTTP to HTTPS. If your site still answers on plain HTTP, run the same command again with --redirect.
Check the result:
sudo nginx -t
curl -I https://example.com
Renewal Is Automatic
Certificates are valid for 90 days, but you do not need to renew them by hand. The apt package installs a systemd timer that runs certbot renew twice a day and renews any certificate that expires within 30 days. With the Nginx plugin, Nginx is reloaded after a renewal.
Confirm the timer exists:
systemctl list-timers | grep certbot
Test the whole renewal process without changing anything:
sudo certbot renew --dry-run
--dry-run only simulates renewal against the Let's Encrypt staging servers. Run it once after setup, and again whenever you change the Nginx config, to be sure renewals will keep working.
Tell Your App It Is Behind HTTPS
The reverse proxy already sends X-Forwarded-Proto, so the app can tell that the original request was HTTPS. Frameworks use this for secure cookies and absolute URLs. In Express, enable it with app.set('trust proxy', 1); Next.js reads it automatically.
Troubleshooting
- "Connection refused" or timeout during validation: port 80 is closed in the firewall or at your cloud provider.
- "DNS problem: NXDOMAIN": the domain doesn't point to this server yet, or the DNS change hasn't propagated.
- Too many failed attempts: Let's Encrypt rate-limits failures. Debug with
--dry-run(or--staging) before trying for real again.